0

Your Cart is Empty

How to Photograph your Koi

by Chris Thomas March 26, 2020 5 min read 1 Comment

How to Photograph your Koi - Kitsu Koi

It’s pretty simple to take a snapshot of your fish (or anything else really) these days as almost everyone has a smart phone. For a lot of subjects, smart phones can even be used to take professional images that can appear in print or online. However, taking photographs of koi is a little more challenging than that Instagram worthy food shot – koi move fast, and the reflections on the water are tricky to work around even with professional equipment and experience.


 Koi Photography - Image showing poor lighting, poor composition, and shadows
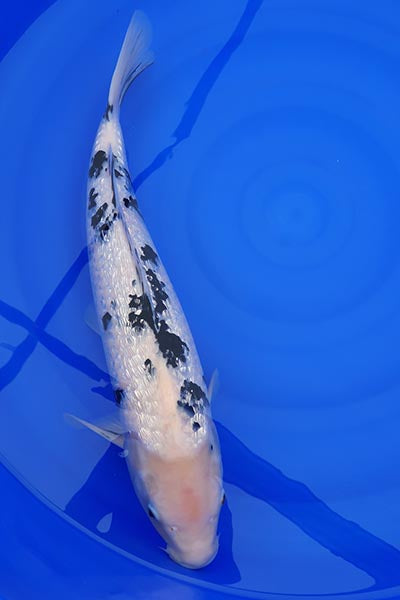
This could be a lot better!


You would want clear photos of your koi if you are trying to advertise them for sale, keep records of growth and development, learn about the bloodline/parents of your koi, online benching for koi shows, or to enter your prized pets in to photo shows. Taking a little time to present the koi well will help to better evaluate body shape, pattern, and skin quality.


 Better! 


In this blog post we will cover equipment, koi handling, and the set up to get better photos. This guide is NOT a guide on ‘photography’, so I will try and avoid technical photography terms (the truth is I only use one setting!). I will use a digital SLR camera and flash, which will give best results, however a lot of the techniques will aid smart phone photographers also.

To take useful photos of koi, you will need some basic equipment that most koi keepers will already own, plus I will list some items that make the process easier and can give better photo results.


  • Bowl – This can be a round bowl or a rectangular measuring bowl. Blue is colour that shows the fish off better
  • Koi Sock – For moving the koi from pond to bowl/bowl to pond
  • Camera – This can be a smart phone but you will get better results with a DSLR and flash
  • Magic Bubble Go Away Spray – AKA Isopropyl Alcohol and a spray bottle
  • A second bowl – For lightly sedating the koi
  • Kusuri Masuizai Koi Sedate – For calming the koi down
  • Notepad- Record the size and any observations
  • A shade – More useful if you don’t have flash, or are taking video.
  • Towel – cameras and water don’t mix. If you’re working alone then you will get your hands wet.


A selection of koi bowls Waterproof Koi Sock
Kusuri Masuizai Koi Sedate


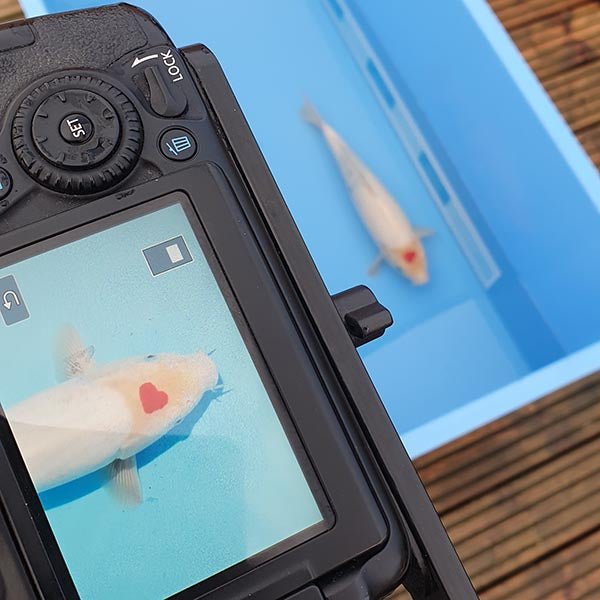
In photography, everything is up for interpretation, but when photographing koi for record keeping, or showing, then there is a perfect shot you want to capture. The photo should be taken with the koi facing the camera, as straight as possible, with the pectoral fins out. To prevent obscuring any details, you want the water to be free of particles, calm without ripples, and good lighting/shade to prevent reflections. Let’s look at the process we follow when taking photos for our website and customers. I’m not claiming to be a pro, nor can I repeat my occasional successes everytime, there are too many jobs to do for me to strive for perfection for the purpose of my photos, but I hope this guide helps you improve your pictures.


  1. Gather all your kit before you start catching koi, as you don’t want to leave fish in a bowl unattended. Make sure your batteries are charged and if you are using a DSLR, make sure you have the SD card ready.
  2. If you’re using a DSLR, then select Manual mode, use an aperture of f7.1 or f8, a shutter speed of 1/200, and ISO100. This should always be fixed – Using the flash in Manual mode, adjust the flash power to change the exposure. Again, these are settings I do not change, this is not a technical guide on the science of photography. The flash will freeze any motion and ‘cuts’ through the glare. I do not use a polarising filter. A standard 15-55mm kit lens will be more than adequate for koi photography. If you're using an up to date smart phone, the standard photo mode will probably be the most suitable settings. 
  3. Fill your bowl with pond water (see my hints and tips if you need clearer water). You will want enough water in the bowl to cover the koi plus a bit more so the water doesn’t ripple too much as the fish moves. It’s good to place the bowl in a spot that allows you to access all sides, in case you have to move to get the shot.
  4. Catch your chosen koi, and carefully place in to the bowl, trying to disturb the water as little as possible.
  5. Once the water has settled, spray a little Isopropyl alcohol on the surface to disperse any bubbles.
  6. Hopefully now the koi is settled in the bowl and slowly swimming. Get ready for the moment the koi will swim down the middle of the bowl without any coaxing, body straight, and fins out. (After several hours, admit defeat and realise koi do not do what you want!)
  7. It’s worth grabbing several shots as you will find photos where you missed the perfect pose, or a stray bubble is obscuring an eye, for example.
  8. If you’re measuring the koi, take the length and record in your notebook. Return the koi to the pond.


Top Tips

  • If you have a second bowl, it’s worth filling both bowls with pond water and adding QUARTER to HALF dose of Kusuri Masuizai Koi Sedate to the second bowl to relax the fish. Don’t sedate the fish too far, as they tend to fin backwards for a while after, which makes it almost as frustrating as a super active koi when trying to photograph. As the fish calms down, transfer to the photography bowl.
  • When your pond clarity is less than perfect, take a large fish bag and fill with dechlorinated water. Let the bag float for 30 minutes to 1 hour and then place the fresh water in your photography bowl. This will eliminate any tinges or particles in your water.
  • Overcast days are best for taking photos outside – the clouds act as a massive diffuser of sunlight, which minimises glare and shadows.
  • If you have a helper, you can use an old koi transport box to create a shade. Simply remove the tape and fold it flat, and block most of the direct light that will cause reflections. You can also use a fishing umbrella, but make sure it is sterilised to eliminate any risk of disease transfer.
  • When using a smart phone, try your manual mode, or if you use the standard camera mode, there may be an option to take burst shots. This might be a cheat to getting some acceptable shots with regard to the fish’s ‘pose’.
  • Do you need a video? A lot of the above applies, but when taking video, I always use a shade, and find a mobile phone is more than adequate for video.


Koi Photography - Perfect Pose
 The perfect pose - hit that shutter button!


I hope this guide will improve your koi photography, and hopefully helps you do better in photo shows, or keep better track of your pets growth and development.

If you need any equipment to help you take better photos of your koi, we have a great selection of bowls and socks to suit all sizes of koi, as well as Kusuri Masuizai Koi Sedate.

Taking photographic records at the start of Spring and end of Autumn provides a great opportunity to check your fish for parasites or any damage. Please check our other blog posts for information on taking mucus samples and examining them under a microscope.

Kitsu Koi - Useful articles about keeping Koi

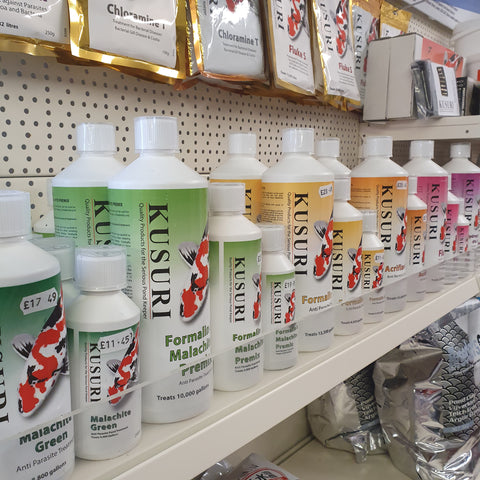
If you do need to treat your koi for parasites or damage, we keep a range of Koi & Pond Treatments in store and online from Kusuri, NT Labs, Aqua Source, Vetark, Lincolnshire Fish Health and more.

Kusuri Koi Treatments and Medications

Chris Thomas
Chris Thomas

Chris has been keeping koi for over 25 years, and dealing in koi for 15 years. Travelling to Japan to select new stocks is the favourite aspect of the business, closely followed by being on the tools pond building.


1 Response

John boyce
John boyce

April 07, 2020

Great advice 👍👍👍

Leave a comment

Comments will be approved before showing up.